Currently, marketplaces like Amazon offer great benefits and growth opportunities to companies that want to develop their business online, mainly thanks to the fact that it guarantees traffic, multiple logistics management options, a seal of trust, and much more. Amazon stands out among the different marketplaces to the point of being the main search engine for online products, even surpassing Google. This is why more and more companies are attracted to this marketplace and seek to be part of it.
If you are one of those people interested in selling your products on Amazon, you have probably noticed that Amazon offers two selling options: Amazon Seller and Amazon Vendor.
What is the difference between Amazon Seller and Amazon Vendor?
Being an Amazon Vendor means that the Amazon team is the one that buys your products and resells them to customers on the platform, thus becoming a direct supplier of Amazon, while, in Amazon Seller, you sell directly to the end customers of the platform.
It is important to note that, to be an Amazon Vendor, you need to receive an invitation directly from the marketplace. That is why, to sell on Amazon, the most common and accessible thing is to create an Amazon seller account or also known as Amazon Seller.
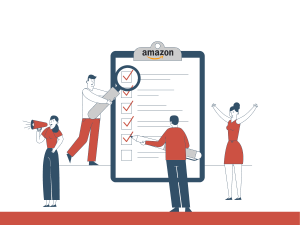
We know that starting to take your first steps in the marketplace can be difficult and that is why, to facilitate this process, we have made this guide for you where we indicate each of the steps you must follow to create your seller account from Amazon Seller Central and start selling through the marketplace.
What are the steps to create your Amazon seller account?
First: Sign up for Amazon Seller Central
To start selling your products it is important that you first create an account through Seller Central, which you can find on this page. Here you only have to fill in the fields with your name, email and password of your choice, which must have at least 6 characters.

Once you have registered in Amazon Seller Central, a page will appear indicating that you enter a code that will be sent to your email. In the event that it does not arrive or the code expires, you can always request it again by clicking on the “Resend Code” button.


Second: Indicates the Location and Type of Business
Now that you have verified your account, a third page will appear, in which you must indicate: where your company is located, the type of company and the corporate name used to register it with your state or federal government. Make sure that when choosing the type of company you select the correct type, since this information cannot be modified later and, in the case of making an error, it will affect the status of your account or it will not directly let you continue with the process .

In addition, you must take into account that the people and entities authorized to create an Amazon seller account are people over 18 years of age and incorporated companies that comply with the legal conditions that allow them to sell in the different national markets to which they are directed.
All the information provided will be subsequently reviewed by Amazon Payments Europe to determine the validity of the data provided and establish if you are eligible to be part of Amazon suppliers.
Tercero: Proporciona la información de tu empresa
As a third step you will have to fill out a form where you must indicate all the information relevant to your company, this includes:
The company registration number: you must indicate the RFC number of your company, natural person with business activity or natural person.
Registered registered office: here you must indicate where your company is located, including zip code, city, province and more. It is important that you make sure that all the fields are filled out correctly because you will not be able to modify this information later and also, Amazon will send you a postcard with a verification code to confirm that the address provided is correct.
Method of contact: as part of the process of creating your Amazon seller account, you must indicate how you want Amazon to contact you and send a confirmation pin, either by SMS or call. This is why you will need to provide a valid mobile number.
Language selection: Since Amazon will send you important notifications, you should be sure to select the language in which you would like to receive these messages. Then you must click on the “Send SMS” button and then a pop-up window will appear indicating that you provide the pin that has been sent to your mobile.

Contact person: within this section you must indicate the name and surname of people with whom Amazon will contact. The names must be written in exactly as they appear in the passport or identity document of the person.
Once all these fields have been completed, you just have to click on the “Next” button
Fourth: Indicates the information of the seller
Within this page you must indicate the information related to the representative of the company/Seller, which includes:
- Nationality.
- Birthdate.
- Country of birth.
- Identification document.
- The country where the identity document has been issued.
- Expiration date of the identity document.
- Residence and mobile phone number, if it is different from the one indicated in the companies section, Amazon allows you to indicate a new phone number.

Also within this page you must indicate if the representative or seller is a beneficiary or legal representative.
You should note that, for Amazon, “Beneficiary” means a natural person who directly or indirectly owns or controls more than 25% of the shares or voting rights of the company, or who is the owner of the company for other media.
On the other hand, legal representative, refers to the person who has specific powers and is the person who has been legally authorized by the company to manage and act on its behalf (eg, to accept terms and conditions or open an account payments, among others). The legal representative may or may not be an owner of the company.
Finally, we must select if you have added all the beneficiaries of the company. Select “No”, in case you have more beneficiaries that you have not been able to include.
After completing all these fields you just have to select the “Save” button
Fifth: Provide your Billing Information
Now we are in the billing information section, where you will have to indicate your credit card number and the name of the cardholder. It is important that this information is linked either to the name of the company or to the contact person indicated in the “Seller Information” section. You must also indicate the billing address to which you want your account statements to arrive.

It is important that you take into account that Amazon will charge you a subscription fee of 39 euros as part of the professional sales plan during the first month of using your account. This value will not be charged if you do not have active listings in the following months.
In addition, if you decide to expand your business to other countries or regions you will have to pay the equivalent of $39.99 per month, divided proportionally between each country or region in which you have an active listing and you will be charged separately in the corresponding currency. . But don’t worry, you can change the sales plan at any time.
When is the subscription fee charged?
Amazon charges the subscription fee once you have completed the entire registration process and have verified your data.
What credit cards are accepted?
Amazon accepts the following credit cards: AMEX, VISA, and MasterCard. Other payment methods, whether prepaid cards, gift vouchers, checks or Internet payment systems (PayPal), will not be accepted.
What happens if I want to change the credit card in the future?
Don’t worry, unlike other information you provide during the registration process, the information related to your credit card can be easily modified from “account information”, by clicking on the “Account settings” tab.
Sixth: Create your store
Now that you have confirmed your payment method, you will be able to access the “Shop” page, here Amazon will ask you to answer some questions related to your company, this will help Amazon to advise you in the best way during your first steps in the marketplace.
Don’t worry about this section, as your answers will not affect whether or not your account is approved by Amazon.
Among the questions that you can find in this section are:
What is the name of your store? If you are not very sure what name to indicate, do not worry, you can put a preliminary name for the moment since you will be able to modify this information later. Likewise, we recommend that the name you choose be clear, simple, descriptive, short and easy for your customers to remember. Also, make sure it is original so that you are not confused with another brand.
Do you have a Universal Product Code (UPC) for all the items you offer? In case you didn’t know, the UPC is a barcode symbology that is used in several countries for the purpose of tracking commercial items in stores.
Do you have any diversity certification (For example, a company wholly owned by women, minorities, veterans or lgtbt? If you do not have any of these certifications, you can answer “no”. Remember that this information will not affect your ability to an Amazon seller account.
Are you the manufacturer or owner of the brand or representative agent of the brand of some of the products? If you are not the manufacturer of the products or have licenses that recognize you as an official distributor, it is preferable that you answer this question with a “no”.
Once all these questions are answered, you can move on to the last step, which is identity validation.
identity validation
Within this section you must upload a photo or a pdf with the scanned identity document of the person you indicated in the “Seller information” section.

This is one of the most important steps that you must perform as part of your Amazon seller account creation, so we advise you to take your time and calmly review each of your information that you have provided since Amazon will use this information for information to ensure that the data provided is valid and legitimate.
For this reason, it is also important that the photo you take of this document is clear and each of the details that the identity document shows can be read.
In addition, within this section you will have to upload a bank certificate or your account statements related to the credit card that you have indicated in the “rates” section. These documents must be in your name, the name of the “Seller” or the company. It is also important that you also include your identification number and address. This information is also key so that Amazon can verify your identity and do not have any problem when opening your Amazon seller account.
Done, you are now in the Amazon Seller Central interface. At this point, you most likely won’t be able to create your listings yet because Amazon still needs to verify your information and this may take a few days. Once your identity is verified, you can start working on your account. If you don’t know very well where to start, we leave you here our free guide with everything you need to know to start selling on Amazon.
At Década Studio we help you create your Amazon seller account
If you still have questions about how to open your account, do not hesitate to contact us and you will receive a free consultancy within 24 hours.

I'm Paola Veintimilla, Marketing Assistant at Década Studio. I like to find creative solutions to problems and I am always looking for new challenges. For me, social networks are a great tool not only to promote brands, but they are also an opportunity to connect with the audience. But in my spare time I'm just a cat lover.